Note: This post may contain affiliate links. We may receive a small commission if you purchase items through the links in this post. All recommendations are genuine. We would absolutely purchase and use ourselves any and all items that we recommend on this blog. Now, on to the good stuff.
Click-to-Buy Supply List for your DIY Dyneema Lifeline Installation:
- Splicing Fids
- 1/4″ Dyneema (or whatever size best fits through your stanchions)
- 1/8″ Dyneema for lashing
- Steel Thimbles
- Gate Hooks: Pelican Hooks or Quick Release Snaps
How To DIY Install Dyneema Lifelines on a Sailboat
Back in April 2019, we decided to replace our original standard cable lifelines with Dyneema synthetic lifelines. I had already done several projects that helped me learn how to splice Dyneema line. (This is the set of splicing fids that I use! It works great!) This project seemed like it would be a good option for us and fairly easy to apply.
In updating this post in November of 2022, we can report that our Dyneema lifelines have held up spectacularly over the past 3 1/2 years. We’ve cruised from the Pacific Northwest in the Puget Sound down the west coast of the USA and into Mexico aboard our sailboat.
Step-by-Step Instructions for Splicing and Installing Dyneema Lifelines
On our boat, we have a mid-section of our lifelines that is stainless steel tubing so I needed to just replace the gate section on each side. Plus a longer section toward the bow on each side. I used 1/4-inch Dyneema for this project.
You will likely have a different arrangement on your boat so the project will merit some critical thinking and careful planning. But, that said, if you’ve got the desire, I assure you this is a project that you can absolutely tackle yourself. Contact me if you’d like to brainstorm ideas for installing Dyneema lifelines on your boat!
Measuring for the Dyneema You’ll Need
Our gate section, mirrored on each side, is 7-feet long and a straight shot (no stanchions or obstructions from start to finish). The forward section of lifeline is 13.5 feet long and has a stanchion that the line has to pass through. Of course, you’ll need extra length on each end of every section for making your splices. On my project, I calculated that I needed a total length of about 108 feet. I wanted to give myself some extra room, so I purchased 120 feet of Dyneema.
For the gate pieces, I calculated that I needed 13″ (bury) + 10″ (splice loop on one end) + 84″ (7-foot stretch) + 5″ (splice loop on thimble side) + 13″ (bury) = 125″ which is about 10 1/2 feet. So I need 4 lengths of that measurement as we have 2 lifeline gates on each side of the boat. That’s a total of 42 feet.
For the forward pieces, I calculated that I needed: 13″ (bury) + 10″ (splice loop on cow hitch side) + 162″ (13.5-foot stretch) + 5″ (splice loop on thimble side) + 13″ (bury) = 197″ which is about 16 1/2 feet. Again, times 4 = 66 feet.
Making and Installing Dyneema Lifelines with Stanchion
I spoke with several “seasoned” sailors about the project and had my plan in place. To start, I would just need to splice a locking eye-splice into one end of the Dyneema line. I would cow hitch that around the stanchion or through the attachment point like below.
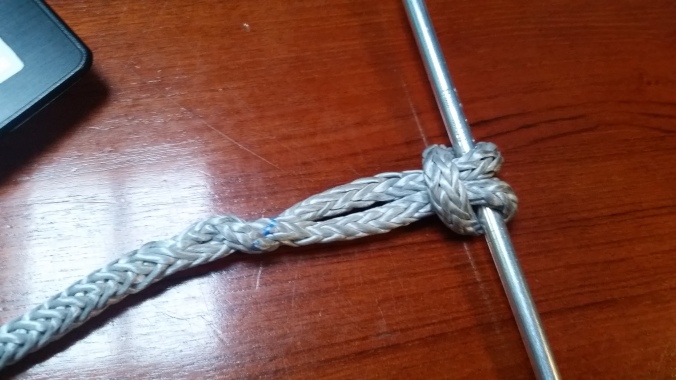
Then, after threading the line through the stanchion, I would make another eye splice and insert a thimble. The thimble will protect the lifeline from chafe. I passed a smaller diameter piece of Dyneema through that thimble several times to tension the lifeline and lash it in place.
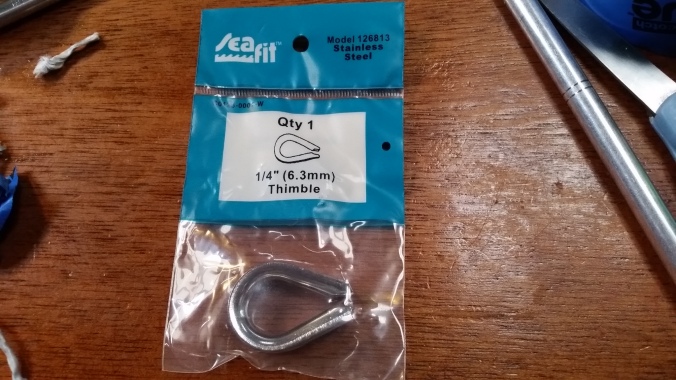
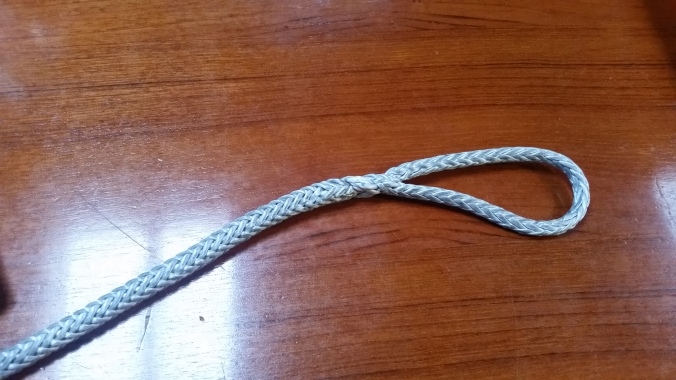
So, before doing anything else, I measured the distances again to double-check. For the forward section, I confirmed 13.5 feet. Then I made my first splice. For the eye splice, I would need a bury length of 12.5 inches, which I rounded up to 13″. On the cow hitch end, which I was doing first, I wanted an inside loop of about 10 inches.
**I’ll drop a link at the bottom of this post to the YouTube video I used for making my Dyneema Brummel locking eye splice using only one end of the line.
Here’s the first splice.
From that point, I needed to go up to and start working on-site. First, I detached the old lifelines and cut them off with a cable cutter to remove them from through the stanchion.
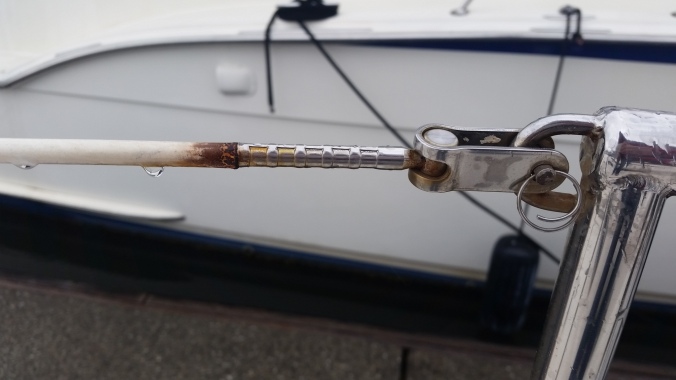
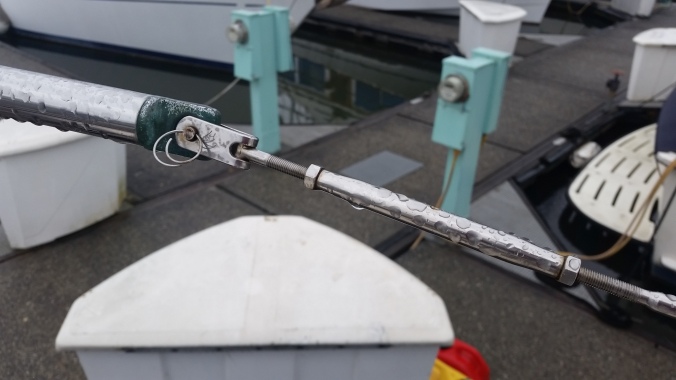
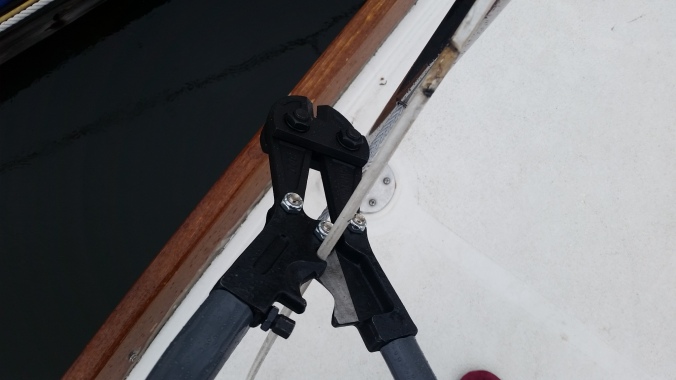
Once I had removed the old lifeline, I cleaned up the connection points. Then I attached the new lifeline to the forward stanchion with a cow hitch knot. For the bottom lifeline, I wrapped the line all the way around the stanchion and used the connection point as a guide.
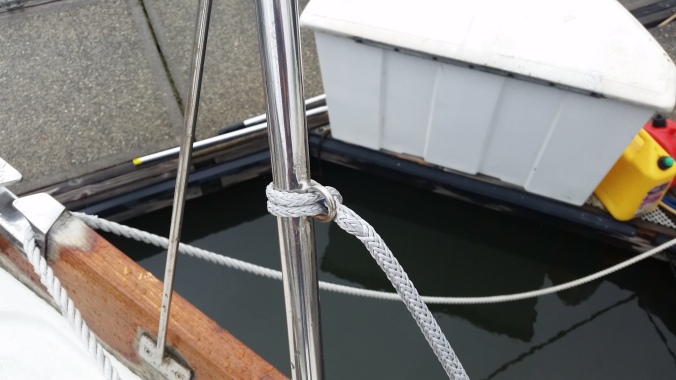
For the top, I just cow-hitched it through the attachment point.
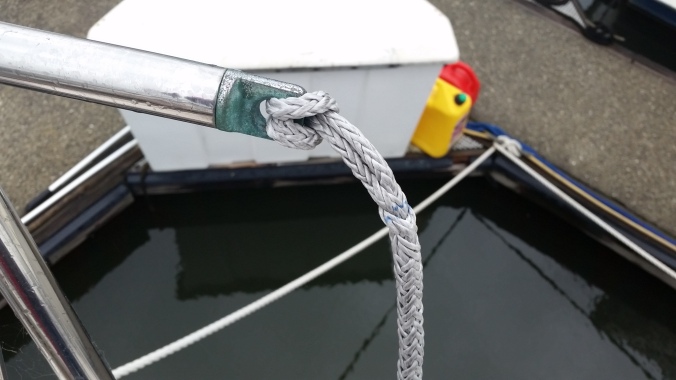
Then, I passed them through the stanchion, measuring to where I wanted the splice and thimble to be. I wanted it a good 6-8 inches from the attachment point on the other end to give plenty of room to stretch the lifeline tight before lashing. Remember to give yourself the extra room for the splice and bury.
Here you can see the 13″ marked on the line at the end for the bury, and the 5-inch section marked for the eye splice and thimble.
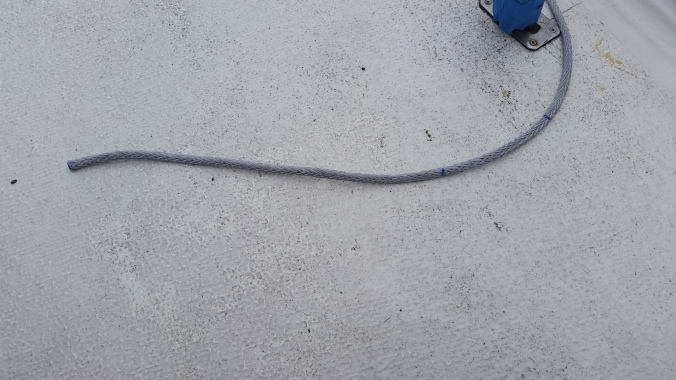
Once measured, go ahead and make your splice and insert the thimble.
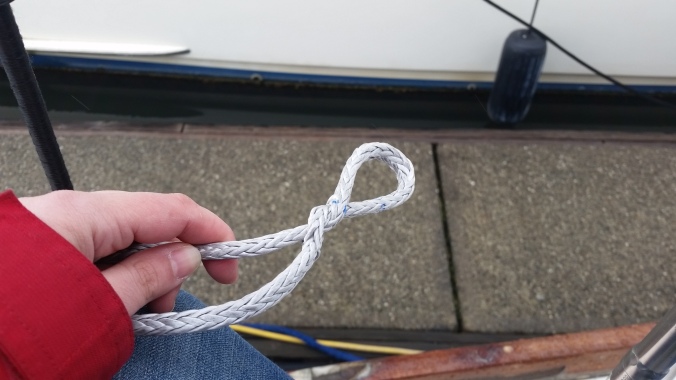
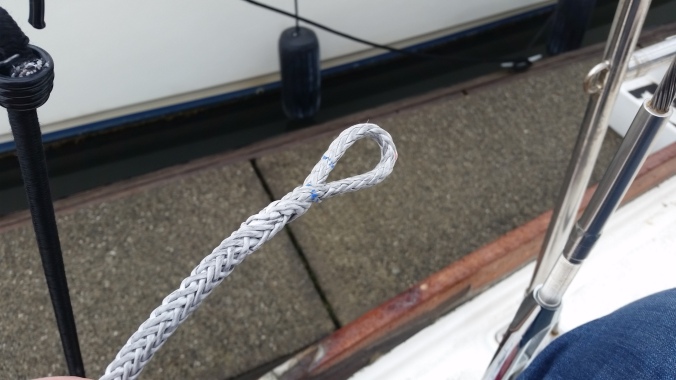
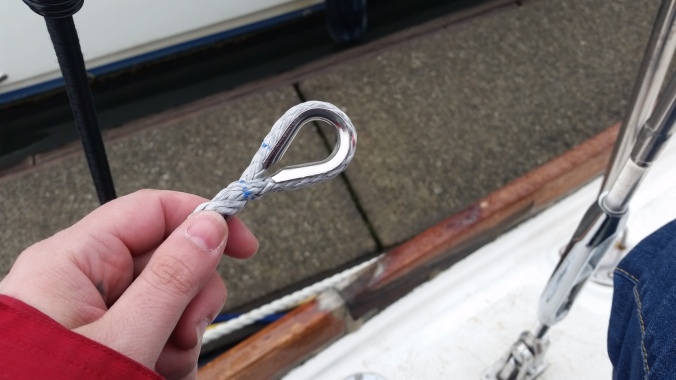
From that point, you need to prepare your lashing. For mine, I used a smaller Dyneema line that I already had here at the boat: 1/8-inch Dyneema.
First, attach one end of the lashing line to the lifeline at the thimble with a double figure 8 knot. See below.
First, tie a loose figure 8 knot in your line, near one end.
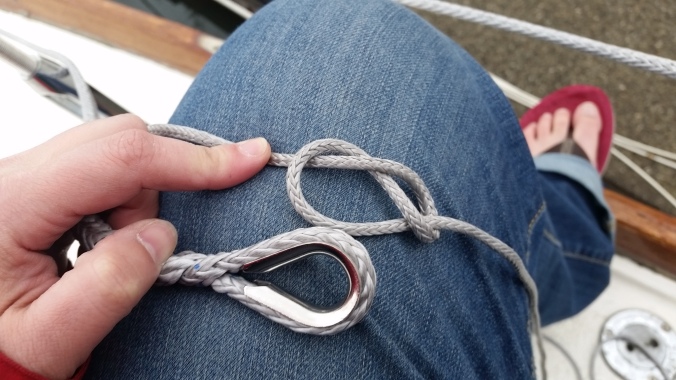
Next, pass the tail through the thimble and then retrace the figure 8 knot backward through the knot.
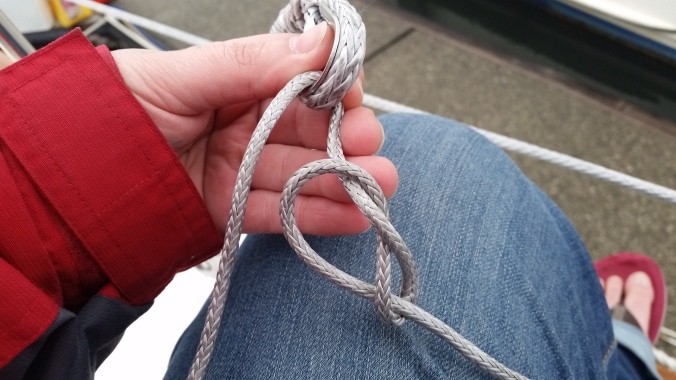
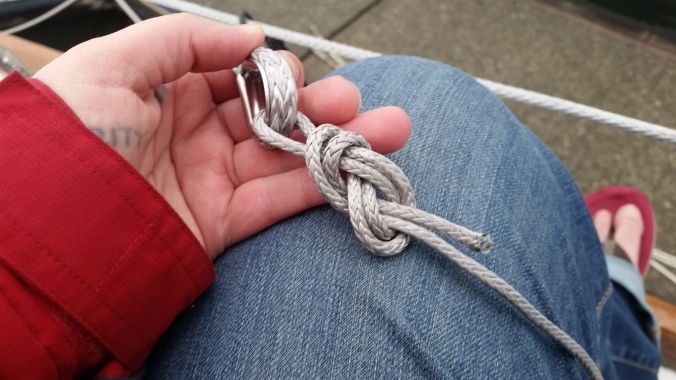
Then, carefully tighten this up as much as you can.
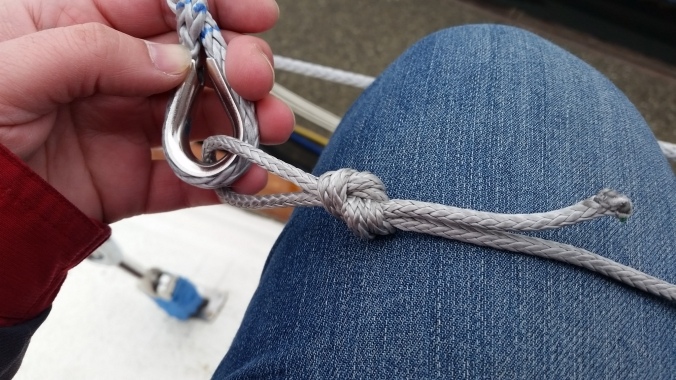
Now you’re ready to do your lashing. Wrap it around at least twice and pull it as tight as you can get it. When it is tight, finish the lashing with a bunch of half hitches.
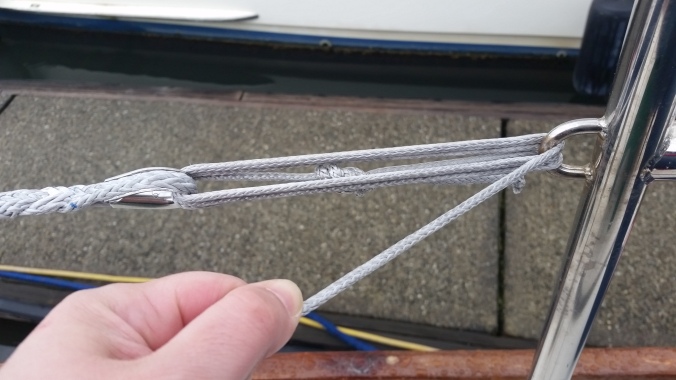
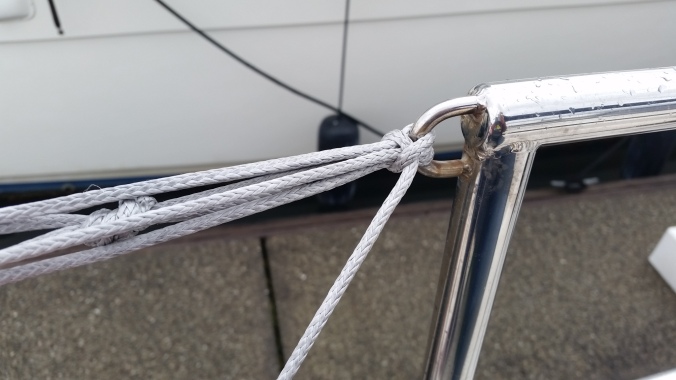
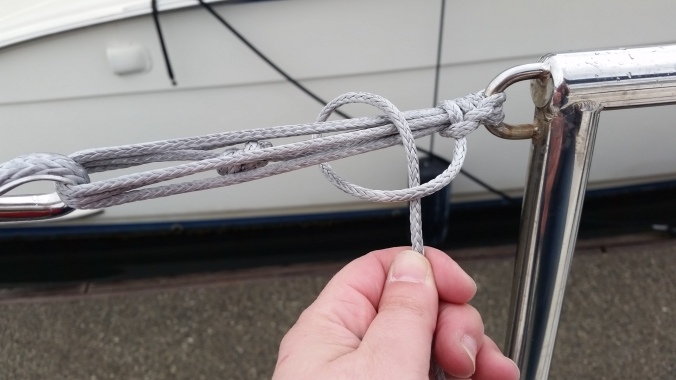

That wrapped up the first of the forward sections of Dyneema lifelines on our sailboat.
Doing the gate sections was a little different. I didn’t need to worry about a stanchion in the middle but I did need to figure out how I was going to tension it. That could be with a lashing or could be integral to the clasp, depending on what type of clasp you use.
Installing Synthetic Dyneema Lifeline Gates
Measuring for my gates was a little more complicated because I was trying to get them to be the correct length to be tight without using a lashing section as a tensioner. Instead, I used the adjustability of the screw section of my ‘pelican hook’ gate hooks to be able to shorten or lengthen the run.
The pelican hooks I used were the existing ones (like these) from the previous set of lifeline gates. (Hey, ya gotta save money anywhere you can when outfitting a cruising boat!) The problem I had was that I needed an eye bolt or some other way to cow hitch on the Dyneema lifeline gate. Here are two options that I found online which I think would work well: pelican hook or quick-release.
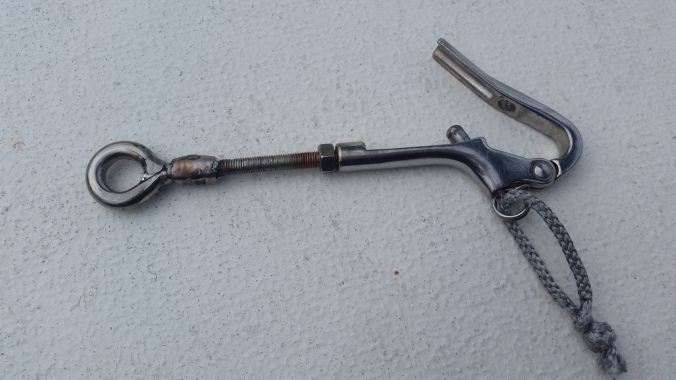
Thankfully, rather than buying new pelican hooks, I was able to get some assistance from my stepdad. We worked out a plan for him to weld some eye bolts onto the existing threaded piece.
So, I started out by making an eye splice on one end of each of the four pieces of Dyneema that I was going to use for my gates. Be very careful at this step to make sure to do your calculations correctly. Don’t cut your pieces too short!
My gates are 7 feet long, so for each piece, I made my first eye splice. Then I measured out 7 feet from the end of the splice loop, plus an extra 5 inches for the loop and plus another 13 inches for the splice bury. I added just a few extra inches on each piece so I wouldn’t be short.
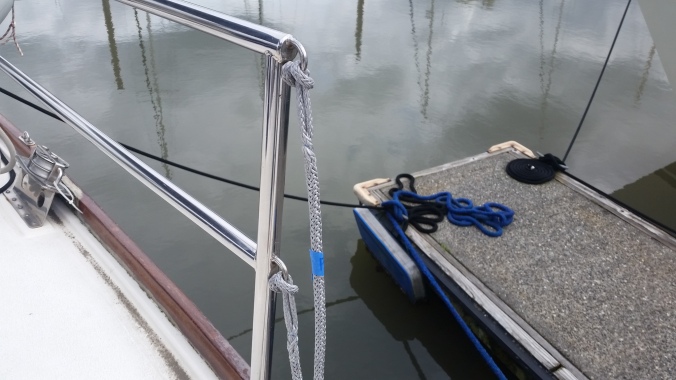
From there, I went up top and cow hitched those sections on and pulled them tight to mark where I would need the middle of the other end’s eye splice to lay.
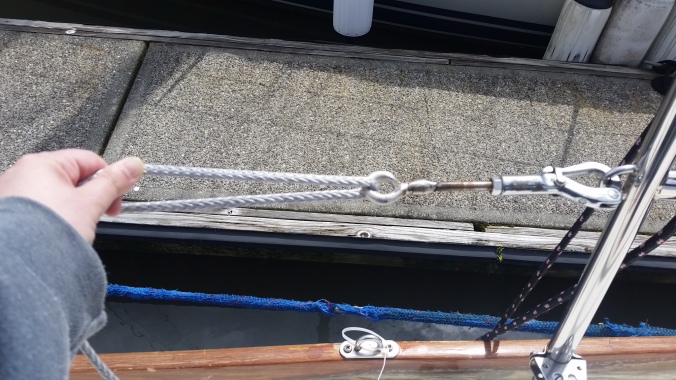
Above, I have the section pulled nice and tight so that I could try to see where I wanted the middle of that eye splice to lay.
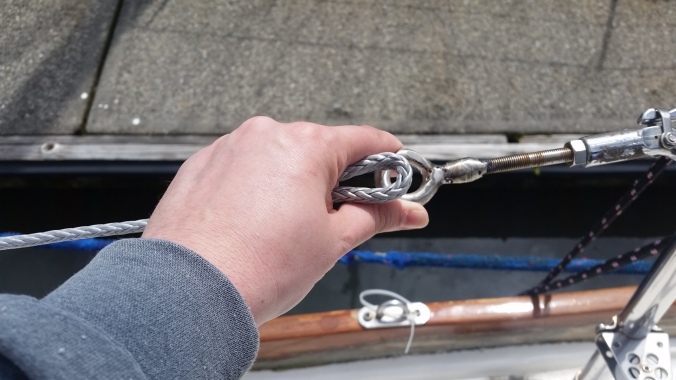
However! That is not truly where you want the center to be because you need to account for a few extra inches that will be taken up in the process of the cow hitch to attach it to the pelican hook.
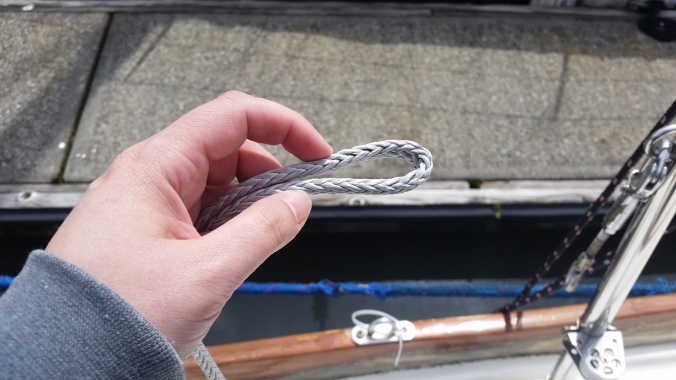
Above, my left index finger is pointing right to where the line actually bent back when I passed the line through the loop in the pelican hook. The bend in the line above, about an extra 2 inches, is where I decided I wanted the actual center of the next eye splice to lie.
Once noted, I went back down below and made my next splices. I gave myself 4 inches on each side of that center mark for the length of the splice loop. Remember your extra 13 inches needed to bury the tail of the splice.
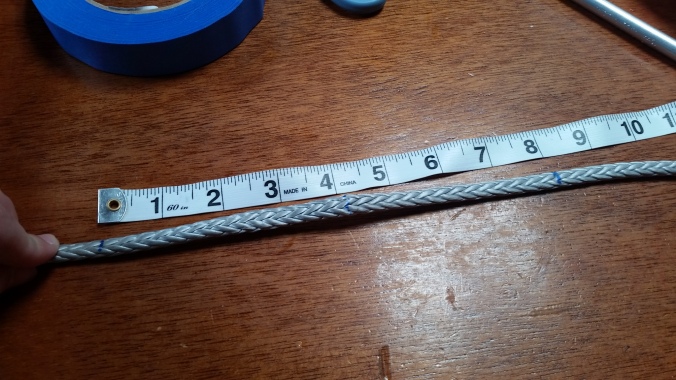
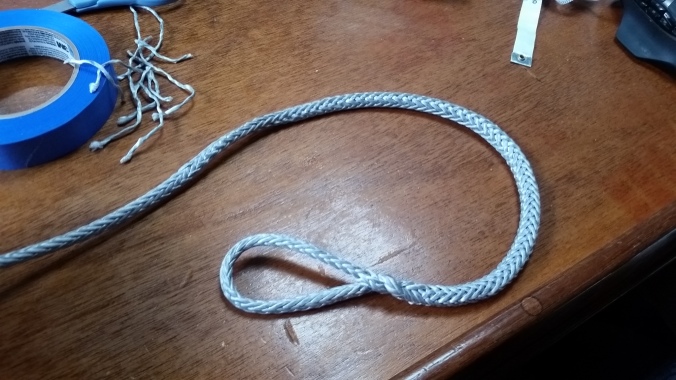
Once that was done, it was simply a matter of heading back up top and attaching the first section to the attachment point. I slipped the splice through the loop on the pelican hook and looped the splice loop back over the pelican hook. This allowed me to bring it back around into a cow hitch on the pelican hook side.
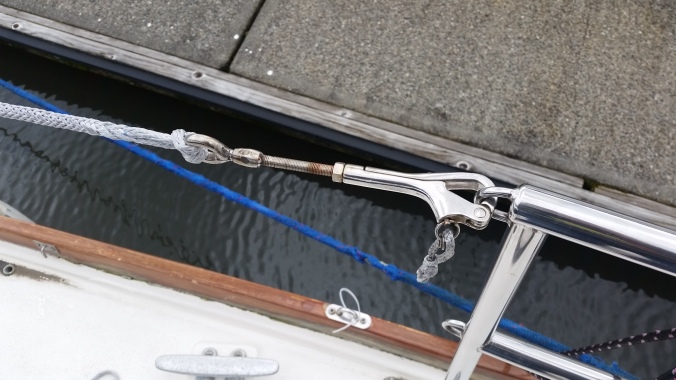
Then, it was just a matter of adjusting the length of the screw/threaded section to ensure a nice snug fit of the gate.
Note: the Dyneema lifelines will stretch out a bit over time (unless you get pre-stretched Dyneema). In just a couple days, I had to go back and tighten the lashings up and adjust the pelican hook settings to keep the lines as tight as we want them. So pay attention to that when planning your lifelines. You will need enough room in them to go back and make them tighter later on.
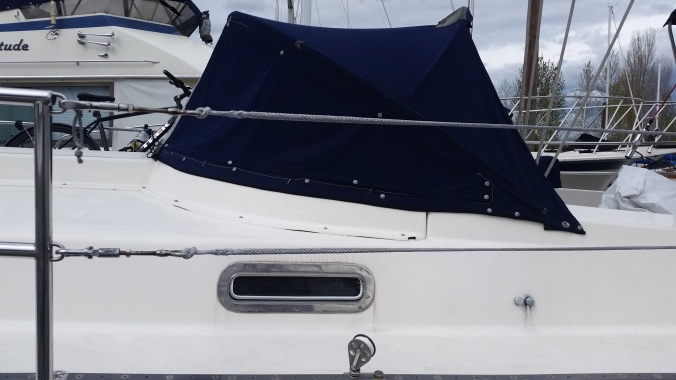
Overall, I am SUPER happy with how these look and how they turned out. They look so much better than our old rusty cable lifelines and I trust the strength of the Dyneema.
Do you have questions on the process at all? Are you ready to replace your old cable lifelines with synthetic Dyneema!? If I can do it, so can you! Give it a go!! Feel free to shoot me a comment or a message on Facebook or Instagram and I would be happy to help if I can!
Cheers! ~Rachel
*Here’s a link to a YouTube video for the splice I used: Dyneema Brummel Lock-Splice with One Side Fixed
*And here’s a link to a YouTube video for the whole project: DIY Dyneema Lifelines by Tula’s Endless Summer
*We’re not associated with either of these videos in any way.


How’s the project going? 🙂 ~Rachel
Hi Neil! We used 1/4″ Dyneema as that is the diameter that the cable lifelines were previously. Hope that helps! 🙂 ~Rachel
Thanks !
I will change them this weekend, can’t see anymore my old rusty lifeline 😅
What size Dyneema did you use?
Thanks! I’m glad you found the post useful. We’re still very happy with our lifelines and haven’t had any issues with chafe or anything at all. Have had to tighten them once or twice as they stretched out a bit, but no big deal there. 🙂 Thanks! ~Rachel
Great explanation, thank you! Are you still happy with your lifelines, would you do anything differently given the chance? Have you had any problems with chafe?
Are you going to make the conversion?
Great, Thanks!
You’re welcome! Hope it helps if you decide to make the switch. We still love ours! 🙂 Let me know if you have questions. Happy to help. ~Rachel
Nice explanation of each step including pictures. Thank you.